Timelapse Camera for Road Construction Projects: Setup Guide
Road construction is one of the few project types where the work literally moves. The camera position that made sense on day one is wrong by week three, and most teams figure this out only after they’ve lost the footage that would have mattered.
Setting up a construction timelapse on a linear road project is categorically different from documenting a building going vertical. The site shifts, the horizon changes, stakeholders want coverage of multiple phases happening simultaneously kilometres apart. This guide is for project owners, site managers, and anyone who has been handed responsibility for a road contract and told to “get it on camera.”
The Misconception Worth Addressing First
Most people assume that construction timelapse is about the final video — the 90-second clip that compresses six months into something shareable. That’s a byproduct. The actual value is the continuous visual record you accumulate while work is in progress.
On road projects specifically, that record covers earthworks sequencing, drainage installation, base layer compaction, pavement laying, and line marking — each of which can become the subject of a contractor dispute or insurance review at any point. A construction timelapse that captures all of this, properly archived and timestamped, is a legal document as much as it is a marketing asset.
Treat it accordingly from the start, not after something goes wrong.
The project manager who sets up timelapse for the final video is solving the wrong problem.
The footage you record this week is the evidence you may need six months from now.
Phase-Based Camera Positioning — This Is Where Most Teams Get It Wrong
A vertical construction project has a fixed reference point: the building. You position your camera once, maybe twice, and it captures the full vertical progression from the same angle. Road construction doesn’t work like that.
A typical road project moves through phases that each demand different coverage. During early earthworks, you need wide-angle documentation of cut-and-fill operations across a broad zone. During drainage and sub-base work, you want tighter coverage of specific sections. During final paving, the progression is linear and fast — a paving machine can lay several hundred metres per day.
How to Structure Your Camera Deployment by Phase
Think in segments, not in fixed points. For a 10km road project, plan for at least three overlapping coverage zones. Each zone gets a camera positioned at an elevated point — a temporary mast, a scaffold tower, or an elevated platform — that captures the full working width plus the immediate surroundings.
- Phase 1 (Earthworks): Wide-angle, elevated positions at 2–3km intervals
- Phase 2 (Drainage/Sub-base): Mid-range coverage of active work sections
- Phase 3 (Paving): Camera positioned ahead of the paving train, moving with it
- Phase 4 (Finishing): Fixed positions at key junctions and entry/exit points
Repositioning cameras between phases is not a failure of planning — it’s the correct approach. Build it into your deployment schedule.
A road timelapse planned as a single fixed installation is going to miss most of what matters.
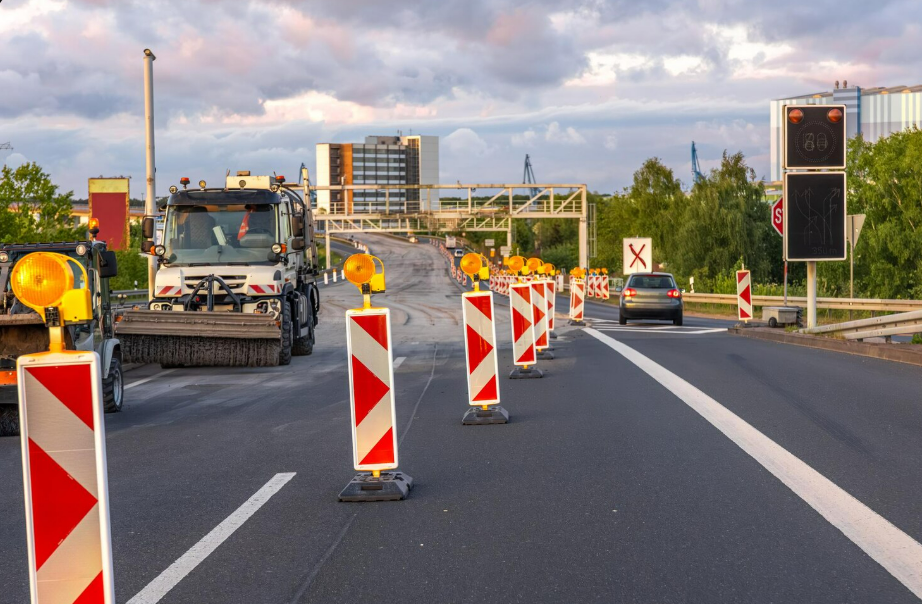
Mounting Solutions for Sites That Don’t Stand Still
Your construction timelapse is only as stable as what it’s attached to. On a road project, this is a real problem. There are no permanent structures in the early phases. Ground conditions change as earthworks progress. Temporary structures get relocated constantly.
The practical solutions are purpose-built mast systems — freestanding steel masts, typically 3 to 6 metres, with a weighted base that doesn’t require ground anchoring. These can be repositioned in under an hour by two people and reconfigured to different heights as terrain changes. They’re also robust enough to handle the vibration from heavy plant equipment operating nearby, which will shake a cheap bracket loose within days.
A road rehabilitation project in the Gulf region used standard CCTV pole mounts for their timelapse units during the first phase. By week two, vibration from compaction equipment had worked loose the camera brackets on two of the three units. One camera was pointing at the sky. The other had rotated 40 degrees from its original framing. Neither failure was noticed for nine days.
The same project switched to purpose-built weighted mast systems for phases two and three. Zero repositioning failures for the remaining 14 weeks of work. The difference in hardware cost was negligible. The difference in usable footage was the entire project record.
Vibration resistance is non-negotiable on road projects. Confirm that the mount system you’re using has been tested in environments with active heavy plant — not just rated for wind load.
A camera that vibrates out of frame is not documenting your project — it’s documenting the sky.
Connectivity on Linear Sites — The Problem No One Plans For
Urban building sites are usually within range of stable cellular networks. Road construction projects regularly pass through areas with weak or no coverage — rural stretches, cuttings below grade, or bridge underpasses that block signal entirely.
Your construction timelapse setup needs to account for this before deployment, not during it. The standard approach is to assess signal strength at each planned camera position before the mount goes up. A 15-minute site walk with a phone and a signal strength app will tell you exactly where you have 4G coverage and where you’re running on edge or nothing.
For positions with poor cellular coverage, the options are local SD storage with scheduled sync (the camera records locally and uploads when signal is available), directional antenna extensions that reach back to a nearby signal source, or satellite-connected units for truly remote deployments.
Three days of offline recording synced at sunrise beats a live feed that drops every 20 minutes.
For large infrastructure deployments — the kind handled by a professional Timelapse Service for Construction & Infrastructure Project — connectivity planning is done during pre-deployment survey, not improvised on install day. If your provider doesn’t survey connectivity before setup, ask why not.
Offline-capable local storage is not a backup feature — it is the feature that keeps your road project documented in the places that matter most.
Capture Settings That Actually Work for Road Projects
Interval settings for construction timelapse are not universal. A building site might capture one frame every 5 to 10 minutes and still produce a useful record. Road construction compresses work differently — a paving pass happens in minutes, not hours.
| Phase | Recommended Interval | Rationale |
| Earthworks / Bulk Excavation | Every 10 minutes | Slow progression; wide area coverage priority |
| Drainage / Subgrade Work | Every 5 minutes | Sequential operations benefit from tighter capture |
| Base Course & Paving | Every 2–3 minutes | Paving machines move fast; gaps in record risk missing key passes |
| Line Marking / Finishing | Every 5–10 minutes | Slower work; wide framing for final condition record |
Storage consumption goes up with tighter intervals, so factor that into your SD card and cloud plan sizing. A camera on a 2-minute interval capturing 12 hours per day will fill 128GB in roughly 6 to 8 weeks at 4K — plan your archive rotation accordingly.
Also set your active recording window to match actual working hours. A camera capturing construction timelapse from midnight to midnight is wasting roughly 60% of its storage on darkness.
Wrong capture intervals produce footage that looks fine until you need to use it for something specific.
Power and Weather: The Two Things That Will Kill Your Setup
Road construction sites — particularly in exposed locations — face conditions that laboratory-rated equipment doesn’t always survive in practice. Dust ingress from earthworks, UV degradation in high-sun environments, temperature cycling between cold nights and hot days, and occasional heavy plant passing close enough to send vibration through the ground.
For road projects, solar-plus-battery is almost always the right power solution. Mains power is either unavailable or unreliable during active works. A properly sized solar panel with a 20,000mAh battery backup will run a modern timelapse unit through multiple overcast days without interruption.
For deployments in high-heat regions — a timelapse camera in Dubai, for instance, or similar Gulf environments — thermal management becomes a real consideration. Camera enclosures in direct sun can reach internal temperatures that exceed operating limits within a few hours. Shade housings, reflective enclosure finishes, and thermal-break mounting systems are not optional in those conditions.
IP67 ingress protection is the minimum for road construction environments. Anything less will be compromised by the dust levels generated by earthworks at scale.
The camera that survives the project is the one that was specified for the worst day on site, not the average day.
What People Actually Ask Before They Set This Up
How do I handle camera repositioning without losing continuity in the timelapse?
You don’t, and that’s fine. Professional construction timelapse for road projects is edited in segments — each phase gets its own sequence, and they’re compiled in post. Trying to maintain a single locked-off angle across a 10km project that’s actively moving isn’t realistic. Document the repositioning with a note in your project log and treat each camera position as its own recorded chapter.
Do I need a separate camera for every section of road, or can I get away with fewer?
Fewer cameras with smart repositioning is usually better than many cameras in fixed positions that become irrelevant as work progresses. A three-camera deployment that moves with the active work front will produce more useful documentation than six cameras spread across a corridor, most of which are filming completed or not-yet-started sections. Prioritise active coverage over comprehensive static coverage.
What resolution do I actually need for road construction timelapse footage?
For documentation and dispute purposes, 4K is worth it. Road projects involve wide shots — you’re often capturing a 200–300 metre zone in a single frame — and you may need to crop into specific areas when reviewing an incident or sequence. 1080p looks fine as a summary video but becomes unusable when you need to zoom into a specific section of a pavement layer or drainage trench. The storage cost difference between 1080p and 4K is small. The quality difference when it counts is significant.
Can construction timelapse footage actually be used in contractor disputes?
Yes, and it’s increasingly common on larger road contracts. Timestamped footage showing sequencing, material placement, compaction passes, or weather conditions during specific work periods has been used to resolve disputes over defects, delays, and scope of work. The key requirement is unbroken chain of custody — footage stored in a cloud archive with verified timestamps carries more weight than locally stored files that could theoretically have been edited.
What’s the minimum setup I need if budget is genuinely tight?
One camera, solar-powered, cellular-connected, positioned at the most critical section of active work — and moved every two to three weeks to follow that critical section. It won’t give you comprehensive coverage, but it will give you a continuous record of the work that carries the most risk and the most value. That’s more useful than five cheap cameras producing patchy, low-quality footage across the whole site.
How long does installation actually take on a road site?
For a properly equipped two-person team, a single camera on a freestanding mast system takes 45 minutes to 90 minutes — including signal testing, framing verification, and system check. For a three-camera deployment across a 10km road section, plan for a full day. Trying to rush it means you’ll miss something in the setup that shows up as a problem two weeks later, usually when you’re not on site to fix it.
Road construction is complex, dispersed, and unforgiving to gaps in the record. The projects that end cleanly — on time, with minimal disputes, and with documentation that satisfies clients and auditors — tend to be the ones where someone made deliberate decisions about coverage from day one rather than improvising a camera setup in week three.
Construction timelapse on a road project is not a one-size-fits-all deployment. It requires phase planning, appropriate mounting, connectivity assessment, and a power solution that matches the site conditions. None of that is complicated. It just needs to be done before the first piece of equipment arrives on site, not after.


