5 Common Mistakes When Installing a Time Lapse Video Camera and How to Avoid Them
You know what? Setting up a time lapse video camera looks easy until you actually do it. I’ve watched plenty of folks mount these things up, feel pretty good about it, then come back a week later wanting to kick themselves. Whether it’s tracking a building going up from nothing or watching how nature does its thing over months, you really want to nail this the first time around.
Look, I’m going to share the mistakes that trip people up most often. Some of these I learned the hard way myself, and honestly, they’re all totally preventable if you know what to watch for.
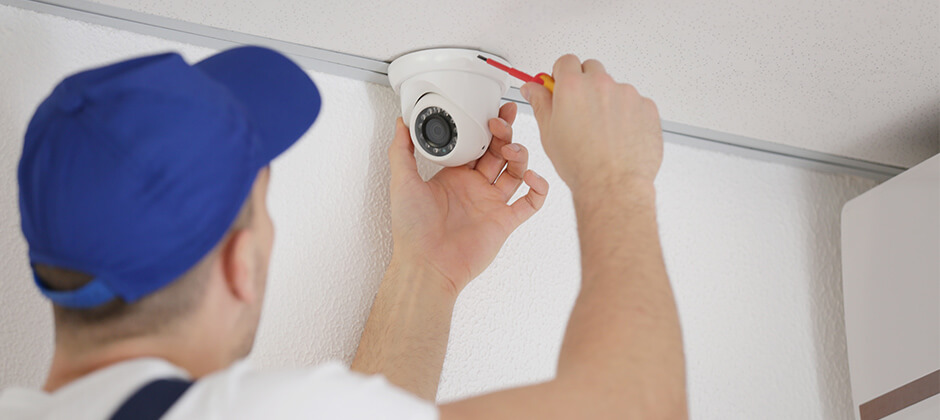
Mistake #1: Picking the Wrong Spot for Your Camera
So here’s the classic scenario. Someone walks around, sees a decent-looking spot, slaps the camera up there, and figures they’re done. Fast forward a few weeks and suddenly there’s a tree blocking everything, or the angle’s completely off from what they actually needed to capture.
The Better Approach:
You’ve got to scout your location at different times before committing to anything. That perfect spot you found at 9 in the morning? Come back at 3 PM and see if those shadows haven’t completely wrecked your shot. When you’re dealing with construction, think ahead about where things will be happening three months down the line, not just what’s going on today.
If you’re browsing for a time lapse camera online, keep an eye out for ones that let you check the view remotely. That way you’re not climbing ladders every other day just to see if your frame’s still good.
Mistake #2: Ignoring Power Requirements
Running out of juice halfway through your project? That’s a special kind of annoying. I’ve seen construction managers lose literal weeks of footage because they just assumed the battery would keep going longer than it actually did.
Smart Solutions:
When you’re in it for the long haul, you need a proper time lapse camera for construction that’s got solid power options figured out. Solar panels? They’re fantastic for outdoor setups where you’ve got decent sun. Got access to site power? Use it, seriously. Relying only on batteries should be your absolute last option unless you’re cool with swapping them out every single week.
The Best Timelapse Camera Solutions out there will actually ping you before the power dies. Seems like a tiny thing, but man, that feature’s saved more projects than I can count from going completely dark at the worst possible moment.
Mistake #3: Skipping Weather Protection
Mother Nature doesn’t care about your deadlines or your budget. Rain, dust, crazy heat, freezing cold – all of it will destroy an unprotected time lapse video camera way quicker than you’d expect.
Protection Steps:
Get yourself some actual weatherproof housing that’s rated for whatever climate you’re dealing with. Those flimsy plastic covers you find cheap? They’re basically useless on a real job site. Your camera time lapse construction setup needs at least an IP65 rating if it’s going outside. Don’t mess around with anything less.
Position things so rain isn’t hitting your lens head-on. Even with good weather sealing, water streaks are going to ruin your shots every time. Angle it down a bit or stick a small hood above the lens.
Mistake #4: Setting the Wrong Capture Intervals
This one’s sneaky because you won’t notice it until you’re sitting there trying to edit everything together. Too many photos and you’re drowning in files. Too few and your video looks choppy, plus you’ve missed all the good stuff.
Finding the Right Balance:
For most construction work, grabbing a shot every 15 to 30 minutes does the job nicely. Got something moving fast? Drop that down to maybe every 5 minutes. Projects stretching across months? You can space things out more.
Most Timelapse Camera for Construction Projects setups let you tweak the intervals without being on-site. Start on the conservative side and adjust once you’re seeing actual results. You can always toss frames later if you need to, but you can’t magically create ones you never took.
Mistake #5: Forgetting About Storage and Maintenance
Your time lapse video camera just keeps shooting, day in and day out. That creates mountains of data. Full memory card? You’re losing footage. Dirty lens? Everything’s blurry and useless.
Maintenance Plan:
Grab high-capacity memory cards that are actually built for constant recording. Stick reminders in your calendar for monthly visits where you clean the lens, check all the connections, and make sure settings haven’t gone wonky.
Cloud-connected camera time lapse construction systems upload everything automatically, which is like insurance for when hardware decides to quit on you. Costs more upfront, sure, but it’s saved plenty of projects when cameras have failed or disappeared.
Questions and Answers
First month? Check it weekly. After that you can probably drop to monthly. Remote monitoring cuts down on this, but you still need physical checks to catch stuff like dirty lenses or the mount shifting that cameras can't tell you about.
Don't dip below 1080p, that's my advice. These days, 4K really makes a difference, especially when clients want to zoom into specific details later. Your time lapse camera for construction should handle 1080p without breaking a sweat at minimum.
Yeah, you can, but it creates this jarring jump in your final video that looks pretty rough. If you absolutely have to move it, try timing it with a weekend or when work's stopped naturally. Better plan though? Get the position right from the start by testing different angles before you lock anything in.
Not technically required, but wow does it make things smoother. Time lapse camera online features mean you can adjust settings, peek at live previews, and grab footage without driving out there. Remote spots? Cellular-connected models work great.
This is exactly why cloud backup isn't optional in my book. Even if someone walks off with your camera or it gets smashed, your footage is sitting safe online. Also, mount cameras high up and in spots that aren't super obvious. Some installers use lockable boxes bolted to permanent structures for extra security.
Decent time lapse video camera models adjust exposure automatically without you doing anything. Mixing day and night shots in your final cut? Usually looks weird unless that's specifically what you're going for. Most construction projects just stick to daylight captures and call it good.
Final Thoughts
Getting your time lapse video camera setup right isn’t rocket science. It just takes some actual planning and paying attention to details that matter. The mistakes I’ve covered here? They’re probably responsible for 90% of the failed installations I’ve run across over the years.
Take your time with the initial setup. Really think through power, weather, positioning, and how you’ll maintain things before you permanently mount anything. That extra hour spent planning upfront saves you from days of headaches later on.
Doesn’t matter if you’re using something simple from a consumer store or dropping serious money on professional Timelapse Solutions – these principles work across the board. Your future self is going to be pretty happy when you’re editing gorgeous, complete footage instead of trying to explain gaps and problems to whoever’s paying for the project.


