Construction Time Lapse Monitoring: Best Practices & Setup Tips
You know what? Setting up a construction time lapse system looked super intimidating to me at first. But after watching a few friends in the industry do it, I realized it’s actually not that complicated once you dive in. I’ve personally seen everyone from small-time contractors working on home renovations to these massive development companies use this stuff, and it genuinely works wonders. Whether you’re overseeing a high-rise that’s going up downtown or just handling a residential project in the suburbs, capturing your build’s progress through time lapse photography has become one of those things you just can’t skip anymore. It’s not optional – it’s essential for keeping records, marketing what you do, and honestly just understanding how your projects actually unfold day by day.
Why Construction Time Lapse Matters
So here’s what I’ve learned about construction time lapse work – yeah, the videos look amazing and clients love them, but that’s almost like a bonus feature. What you’re actually getting is this wild perspective where months of work get compressed into a few minutes. My buddy who manages projects downtown uses these videos all the time to catch delays he never would’ve spotted otherwise. He’s also used them to document work quality when subcontractors swore they did things differently, and honestly, for settling those annoying disputes that always seem to come up on job sites.
The whole construction industry has really grabbed onto this technology recently, and I totally get why. Think about it – you’re getting proof of what happened, complete transparency for everyone involved, and this incredible marketing tool all rolled into one. I mean, have you ever tried explaining a project timeline to a client using spreadsheets versus just showing them a quick time lapse? There’s literally no comparison. People get it immediately when they can watch it happen.
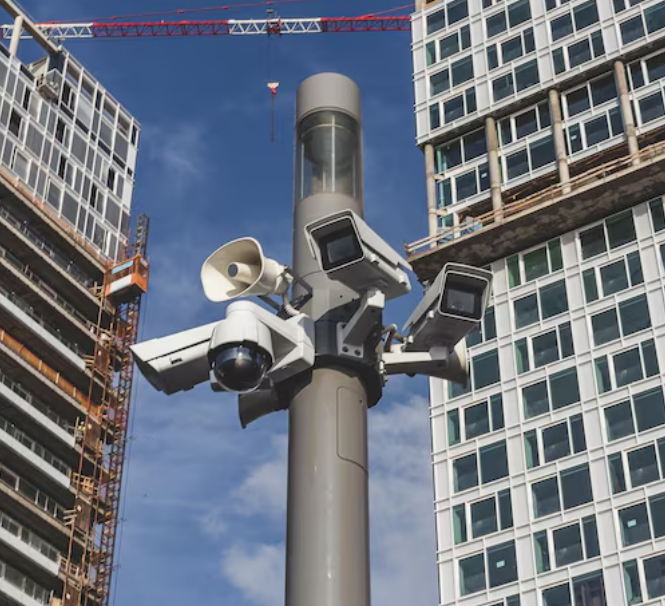
Choosing the Right Equipment
Okay, real talk – your camera choice matters way more than you might think. It can completely make or break your entire setup. You absolutely need weather-resistant cameras with batteries that last forever (or at least feel like it). And if you’re working somewhere with crazy weather – like if you need a timelapse camera in Dubai where the heat is brutal and dust storms roll through – you’ve gotta spring for that extra protection. I’m talking about weatherproof housing that’s rated IP65 or higher. Don’t cheap out here.
When you’re actually shopping around for a timelapse camera for construction projects, here’s my checklist of stuff you really shouldn’t compromise on:
- You want at least 12-megapixel resolution because grainy, blurry footage doesn’t help anyone
- Look for solar panel or AC power options – nobody wants to climb up and swap batteries every other week
- Remote monitoring through your phone is honestly a lifesaver (being able to check your camera from your couch is pretty sweet)
- Make sure the mounting system can handle serious wind without your camera ending up in the next county
- Get one with internal memory backup because trust me, internet connections always fail at exactly the wrong moment
Setting Up Your Time Lapse System
Location matters so much more than people realize. You’ve got to mount your camera somewhere that captures everything happening on site without workers or big equipment constantly photobombing your shots. High up usually works best – maybe there’s a building nearby, or one of those tall poles everyone forgets exists, or you could even mount it on a crane if that’s an option. Just be really careful about picking a spot where you won’t have to move the thing halfway through when construction completely changes how the site looks.
Here’s what I’ve seen work really well on most projects:
Power and connectivity: If you can possibly run a dedicated power line, do it. Solar panels are fantastic for those sites that are way out there with no power nearby, but you’ve gotta make sure there’s actually enough sunlight year-round – not just during those perfect summer months. And seriously, get yourself a strong cellular or WiFi connection. Dealing with choppy uploads will absolutely drive you up a wall.
Camera angles: Don’t just point your camera straight at the site like most people’s first instinct. Angle it at about 45 degrees instead. This simple change gives you so much more depth and shows way more of what’s actually happening. And please, please take a bunch of test shots before you permanently mount everything. That fifteen minutes of testing will save you hours of frustration later when you realize your angle is all wrong.
Shooting intervals: For most construction time lapse videos I’ve seen, taking a photo every 15-30 minutes during working hours hits that sweet spot. But don’t just blindly follow that rule – adjust it based on how fast things are actually moving on your site. If you’ve got a crew that’s flying through work, maybe go with shorter intervals so you don’t miss all the action.
Best Practices for Clear Time Lapse Results
Getting clear time lapse for construction sites really boils down to sweating the small details that most people overlook. Clean your camera lens every single month, no matter what. I learned this the hard way – dust, rain, bird droppings, whatever – it all blurs your footage way faster than you’d expect. My recommendation? Just schedule lens cleaning during your regular site walk-throughs so it becomes automatic rather than something you keep forgetting about.
Here’s something else – lighting changes dramatically from morning to evening, and yeah, modern cameras try to adjust automatically, but you’ll honestly get much better results if you take manual control. Lock down your white balance and exposure settings so your footage stays consistent. Nothing makes a construction time lapse video look more amateur than lighting that’s jumping around like crazy from frame to frame.
Oh, and don’t forget about the really practical stuff like protecting your gear from theft and vandalism. Use lockboxes, put cameras in spots where people can’t easily reach them, slap up some warning signs. For the bigger projects especially, getting insurance that specifically covers your time lapse equipment is worth every single penny. I’ve heard too many horror stories about stolen cameras to skip this step.
Managing Your Footage
Storage space fills up insanely fast – way faster than you’re probably thinking right now. A year-long project? You’re looking at thousands and thousands of images. Cloud storage with automatic backup isn’t one of those “nice to have” things – it’s absolutely how you protect everything you’ve captured. Organize your files by date and project phase, or I promise you’ll be kicking yourself later when you’re trying to edit and can’t find anything.
You’ve gotta check your footage every week. I know it sounds tedious, but weekly reviews are how you catch technical problems before you’ve lost three weeks of recording. Maybe you realize you need to adjust your intervals because you’re capturing way too much boring detail or not nearly enough of the important stuff. The whole goal here is showing progress clearly without creating these massive files that nobody wants to deal with or has space to store.
When you finally get to create your finished construction time lapse video, you’ll definitely need some editing software. Most camera systems throw in some basic tools, but if you want real control over the final product, dedicated software like Adobe Premiere or Final Cut Pro makes a world of difference. Add your company logo, throw in the project details, maybe pick some background music that doesn’t sound cheesy, and suddenly you’ve got something polished enough that you’d be proud to show potential clients.
Troubleshooting Common Issues
Even the absolute best setups run into annoying problems sometimes. Foggy lens covers happen constantly in humid weather – you can fix this with anti-fog coatings or those little lens heaters. Your camera angle will shift from vibrations, especially after any major site work like pile driving or when heavy equipment is moving around nearby, so definitely check that your mounting is still rock-solid after anything that shakes the ground.
Connection drops are super frustrating but totally manageable if you plan for them. Set your system up to automatically retry any failed transfers instead of just giving up. Always keep local storage as a backup so you never lose those absolutely critical shots. And if you’re running everything on battery power, check those batteries way more often than you think you need to. Winter is especially rough because cold weather just murders battery life way faster than most people realize until it happens to them.
Questions & Answers
Most of the professional systems out there can run somewhere between 6-12 months without you physically messing with them, as long as you've set everything up right with reliable power and decent weatherproofing. Remote monitoring is clutch because you can check how everything's doing every day without actually driving out to the site.
Somewhere in that 15-30 feet range above the highest point of whatever you're building usually works great. This height gives you coverage of the entire site while keeping enough detail that people can actually see what's going on down there. Obviously adjust this based on how big your specific project is.
Oh yeah, absolutely, especially for those larger projects where one angle just doesn't cut it. Multiple angles give you so much more flexibility when you're editing. Just make sure to synchronize when they're all taking photos so you can create those cool split-screen videos or smoothly switch between different perspectives without everything looking totally mismatched.
4K gives you a ton of flexibility if you want to crop or zoom during editing. That said, 1080p works perfectly fine for most situations and doesn't gobble up nearly as much storage space. Just match your resolution to what you'll actually end up using the footage for.
Getting Started Today
Construction time lapse systems have gotten so much cheaper and easier to use just in the last few years. Start by doing some research on cameras that handle your specific climate well and match the types of projects you typically work on. Definitely talk to providers about trial periods if they offer them – actually getting your hands on the equipment and playing around with it teaches you about a hundred times more than reading through spec sheets on a website ever could.
Write everything down – your setup procedures, what settings worked, what didn’t. Your next few projects will go so much smoother when you’ve already figured out what configurations actually work in real life instead of just in theory. That very first construction time lapse video you manage to put together? It’s going to teach you more lessons than any guide or YouTube tutorial possibly can. You’ll make mistakes, figure them out, and know better next time.
The technology keeps improving every year, which is cool, but honestly the basics stay pretty much the same: get reliable equipment that won’t crap out on you, position it smartly, and keep checking on things regularly. Stick to these simple practices and you’ll end up with genuinely stunning progress videos that keep adding value to your portfolio long after the actual construction wraps up and everyone’s moved on to the next project.
Whether you’re building something in harsh desert conditions where everything’s trying to cook your equipment, or you’re dealing with more moderate climates that have their own challenges, these core principles work across the board. Get your clear time lapse for construction sites by really planning things out thoroughly from the start, setting everything up carefully instead of rushing it, and maintaining your equipment consistently instead of ignoring it for months. The results honestly speak for themselves – you’re literally showing months and months of hard work compressed into just a few minutes of footage that people actually want to sit and watch instead of zoning out.


